Set up in two minutes
A walkthrough of the Chat to Markdown welcome page: choose a folder or Obsidian vault, turn on your chat services, pin the extension and press Start saving.
In short
On the welcome page, choose a folder (your Obsidian vault works), turn on the AI services you use and allow each site when Chrome asks, then press Start saving. Your chats start saving in a minute, and from then on it runs on its own.
On this page
When you install Chat to Markdown, a welcome page opens with three steps. This page walks through each one, what you will see, and what to do if a step doesn’t go as expected.

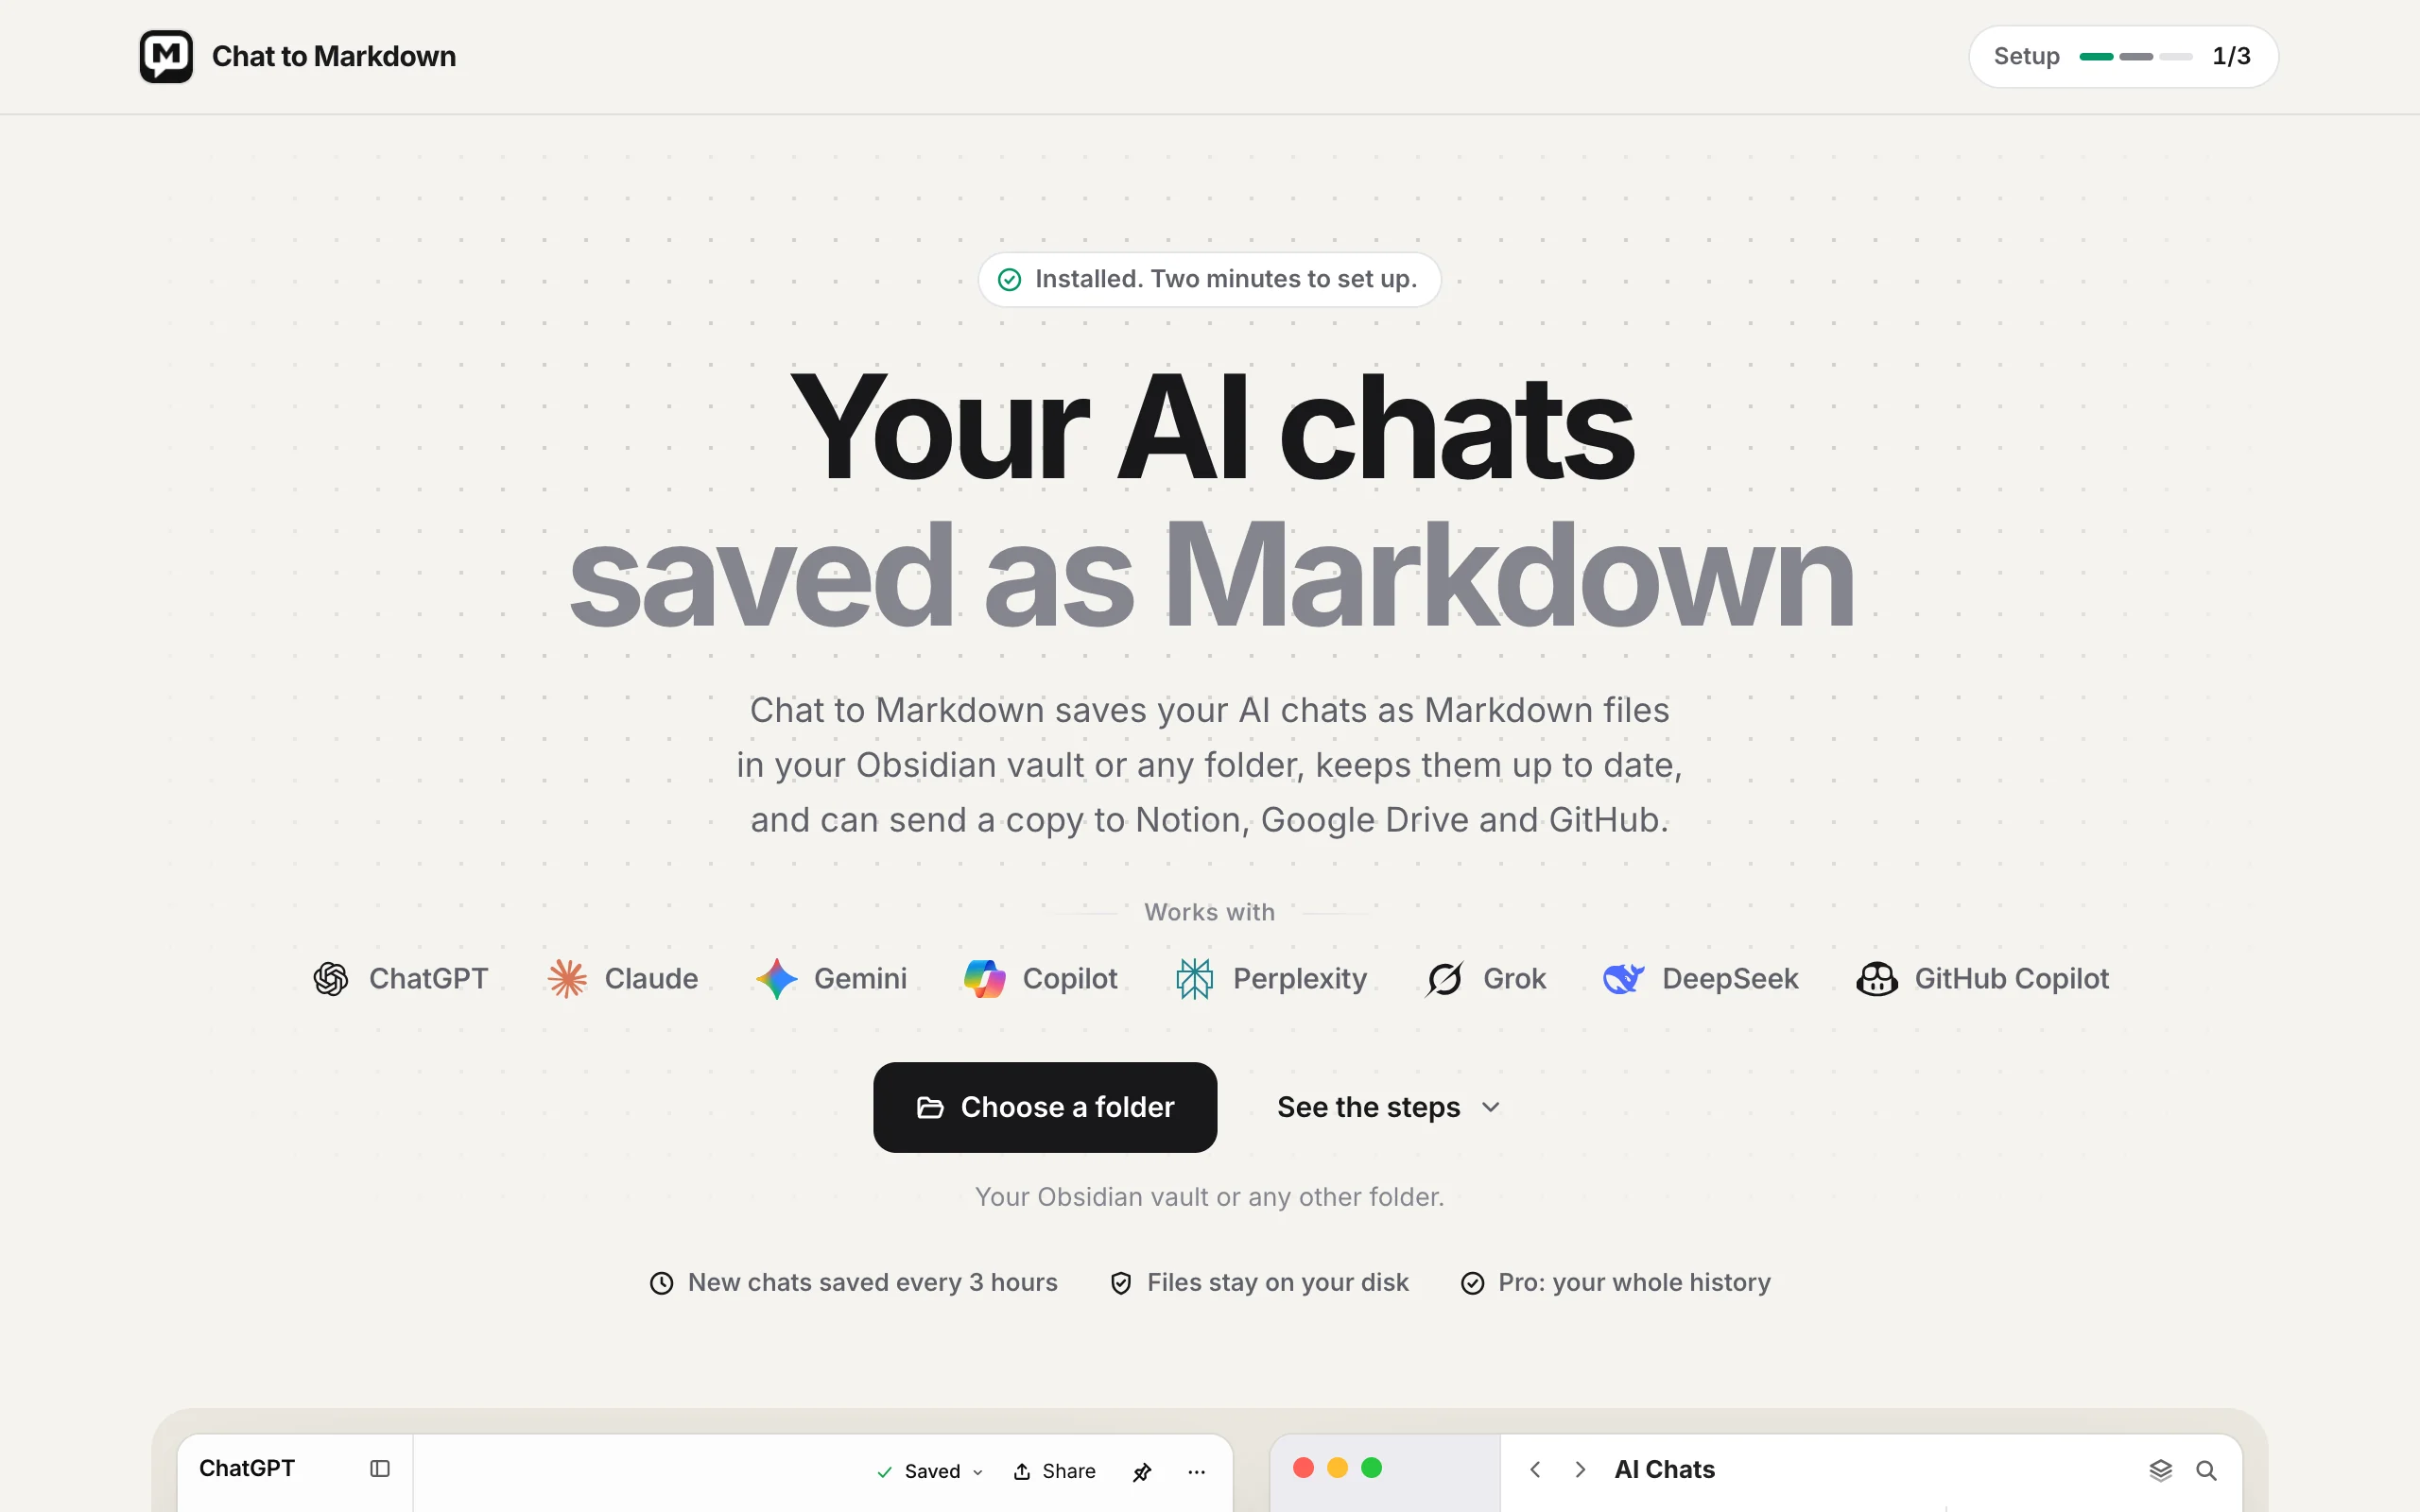

At the top right, the Setup tracker counts your progress from 0/3 to 3/3. When all three are done it reads Set up. You can do the steps in any order; only the folder is required to start.
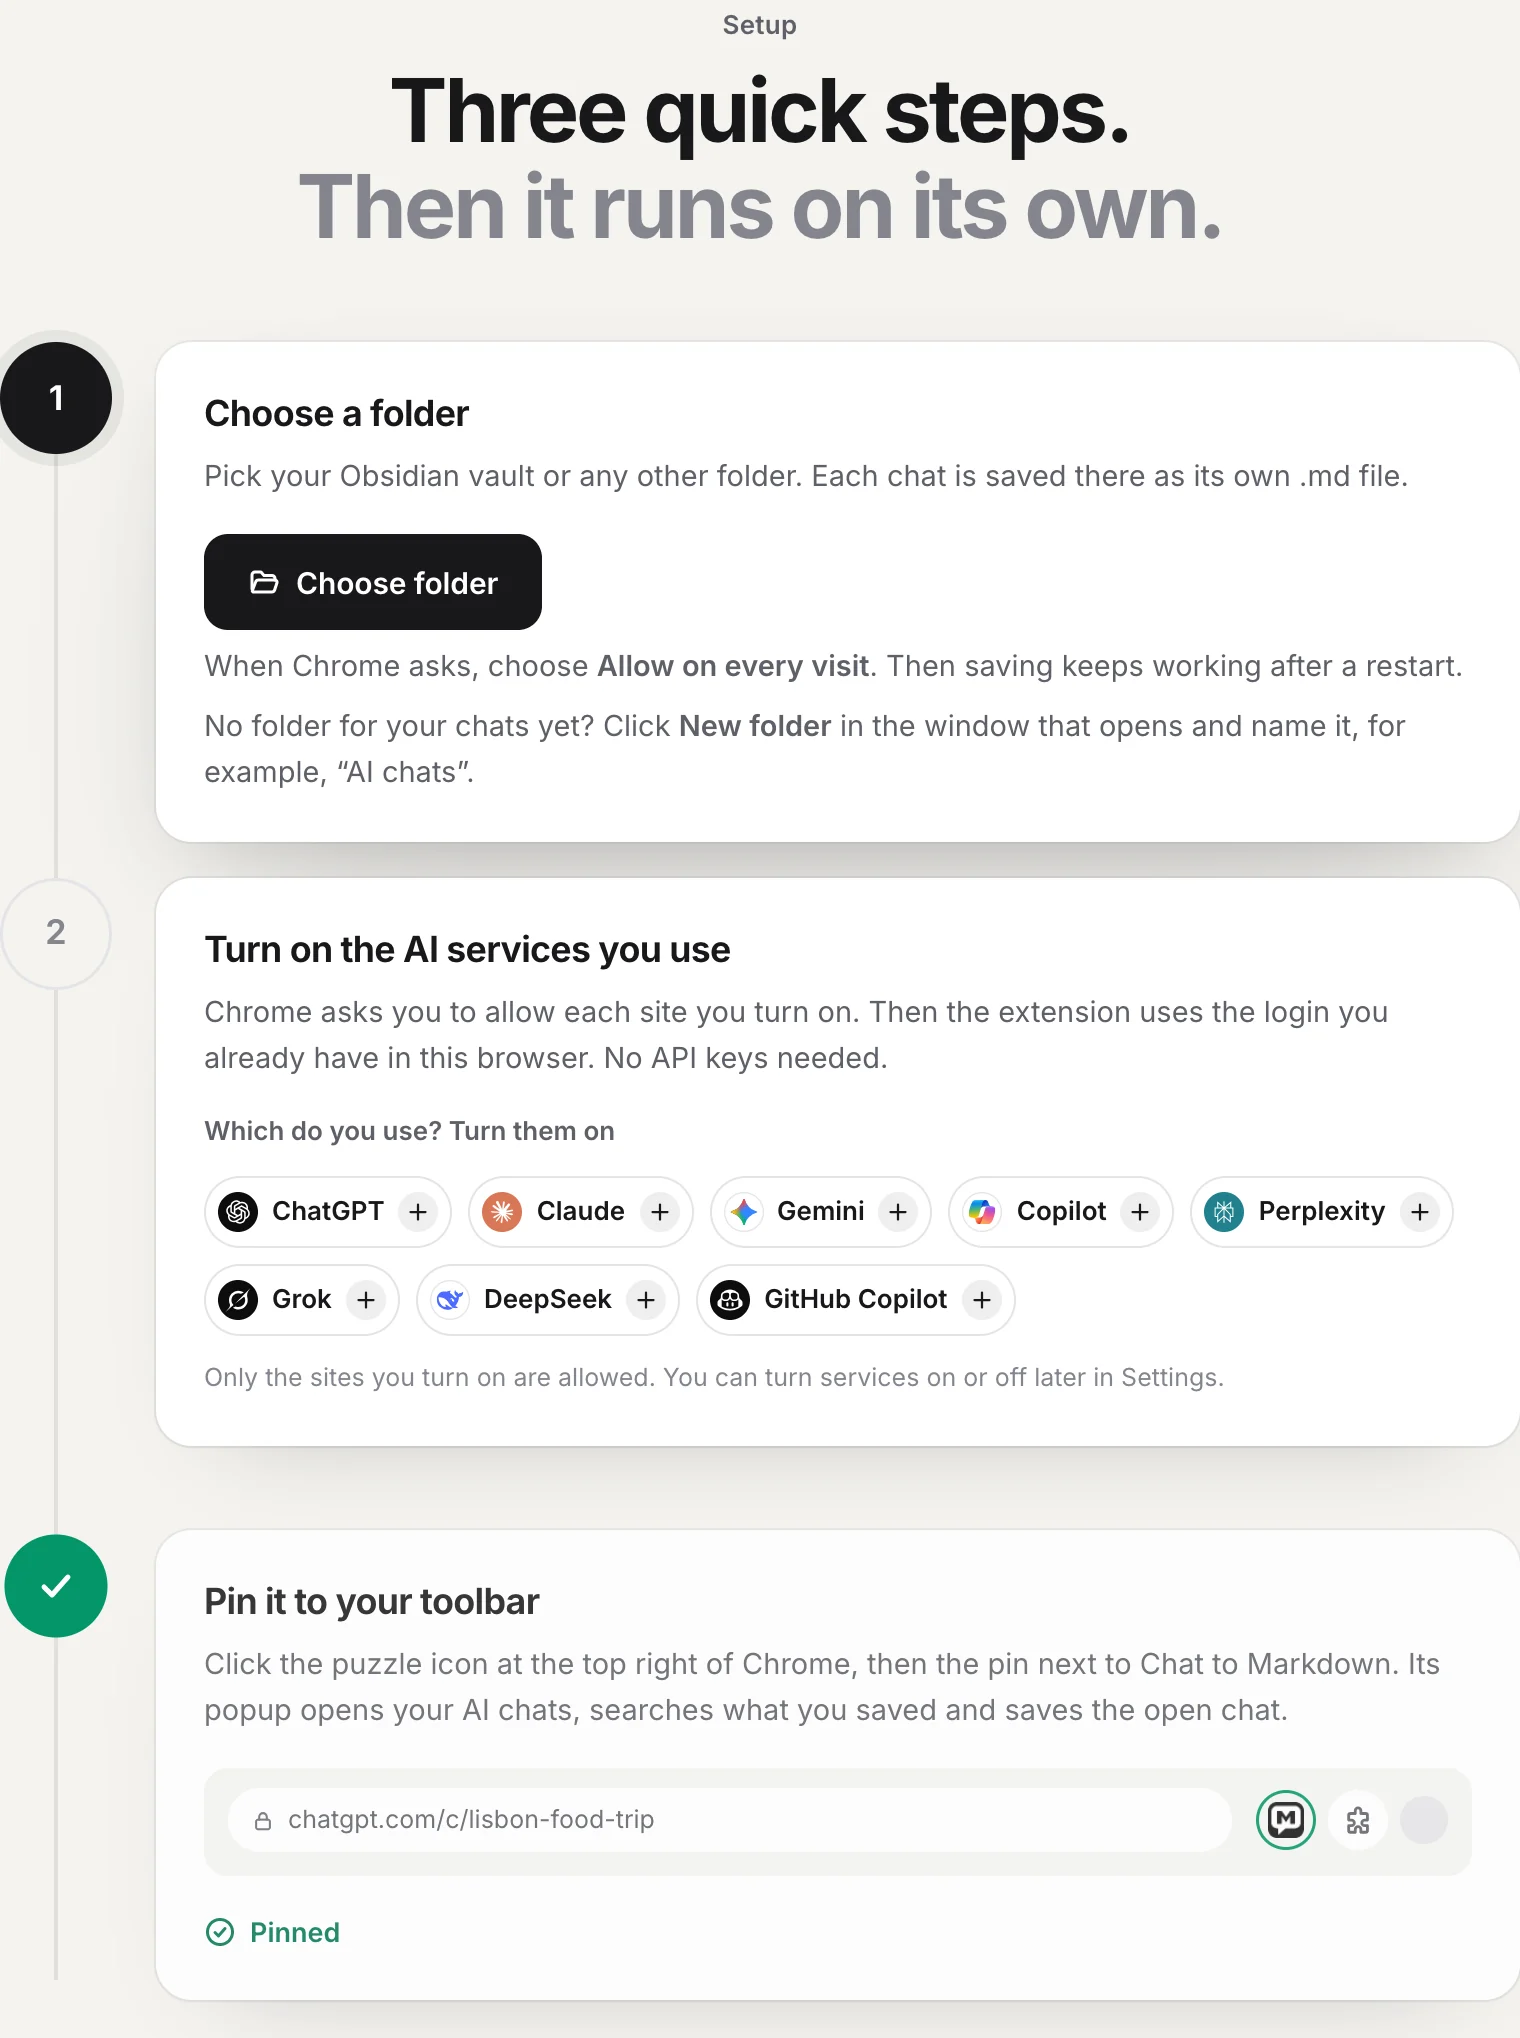
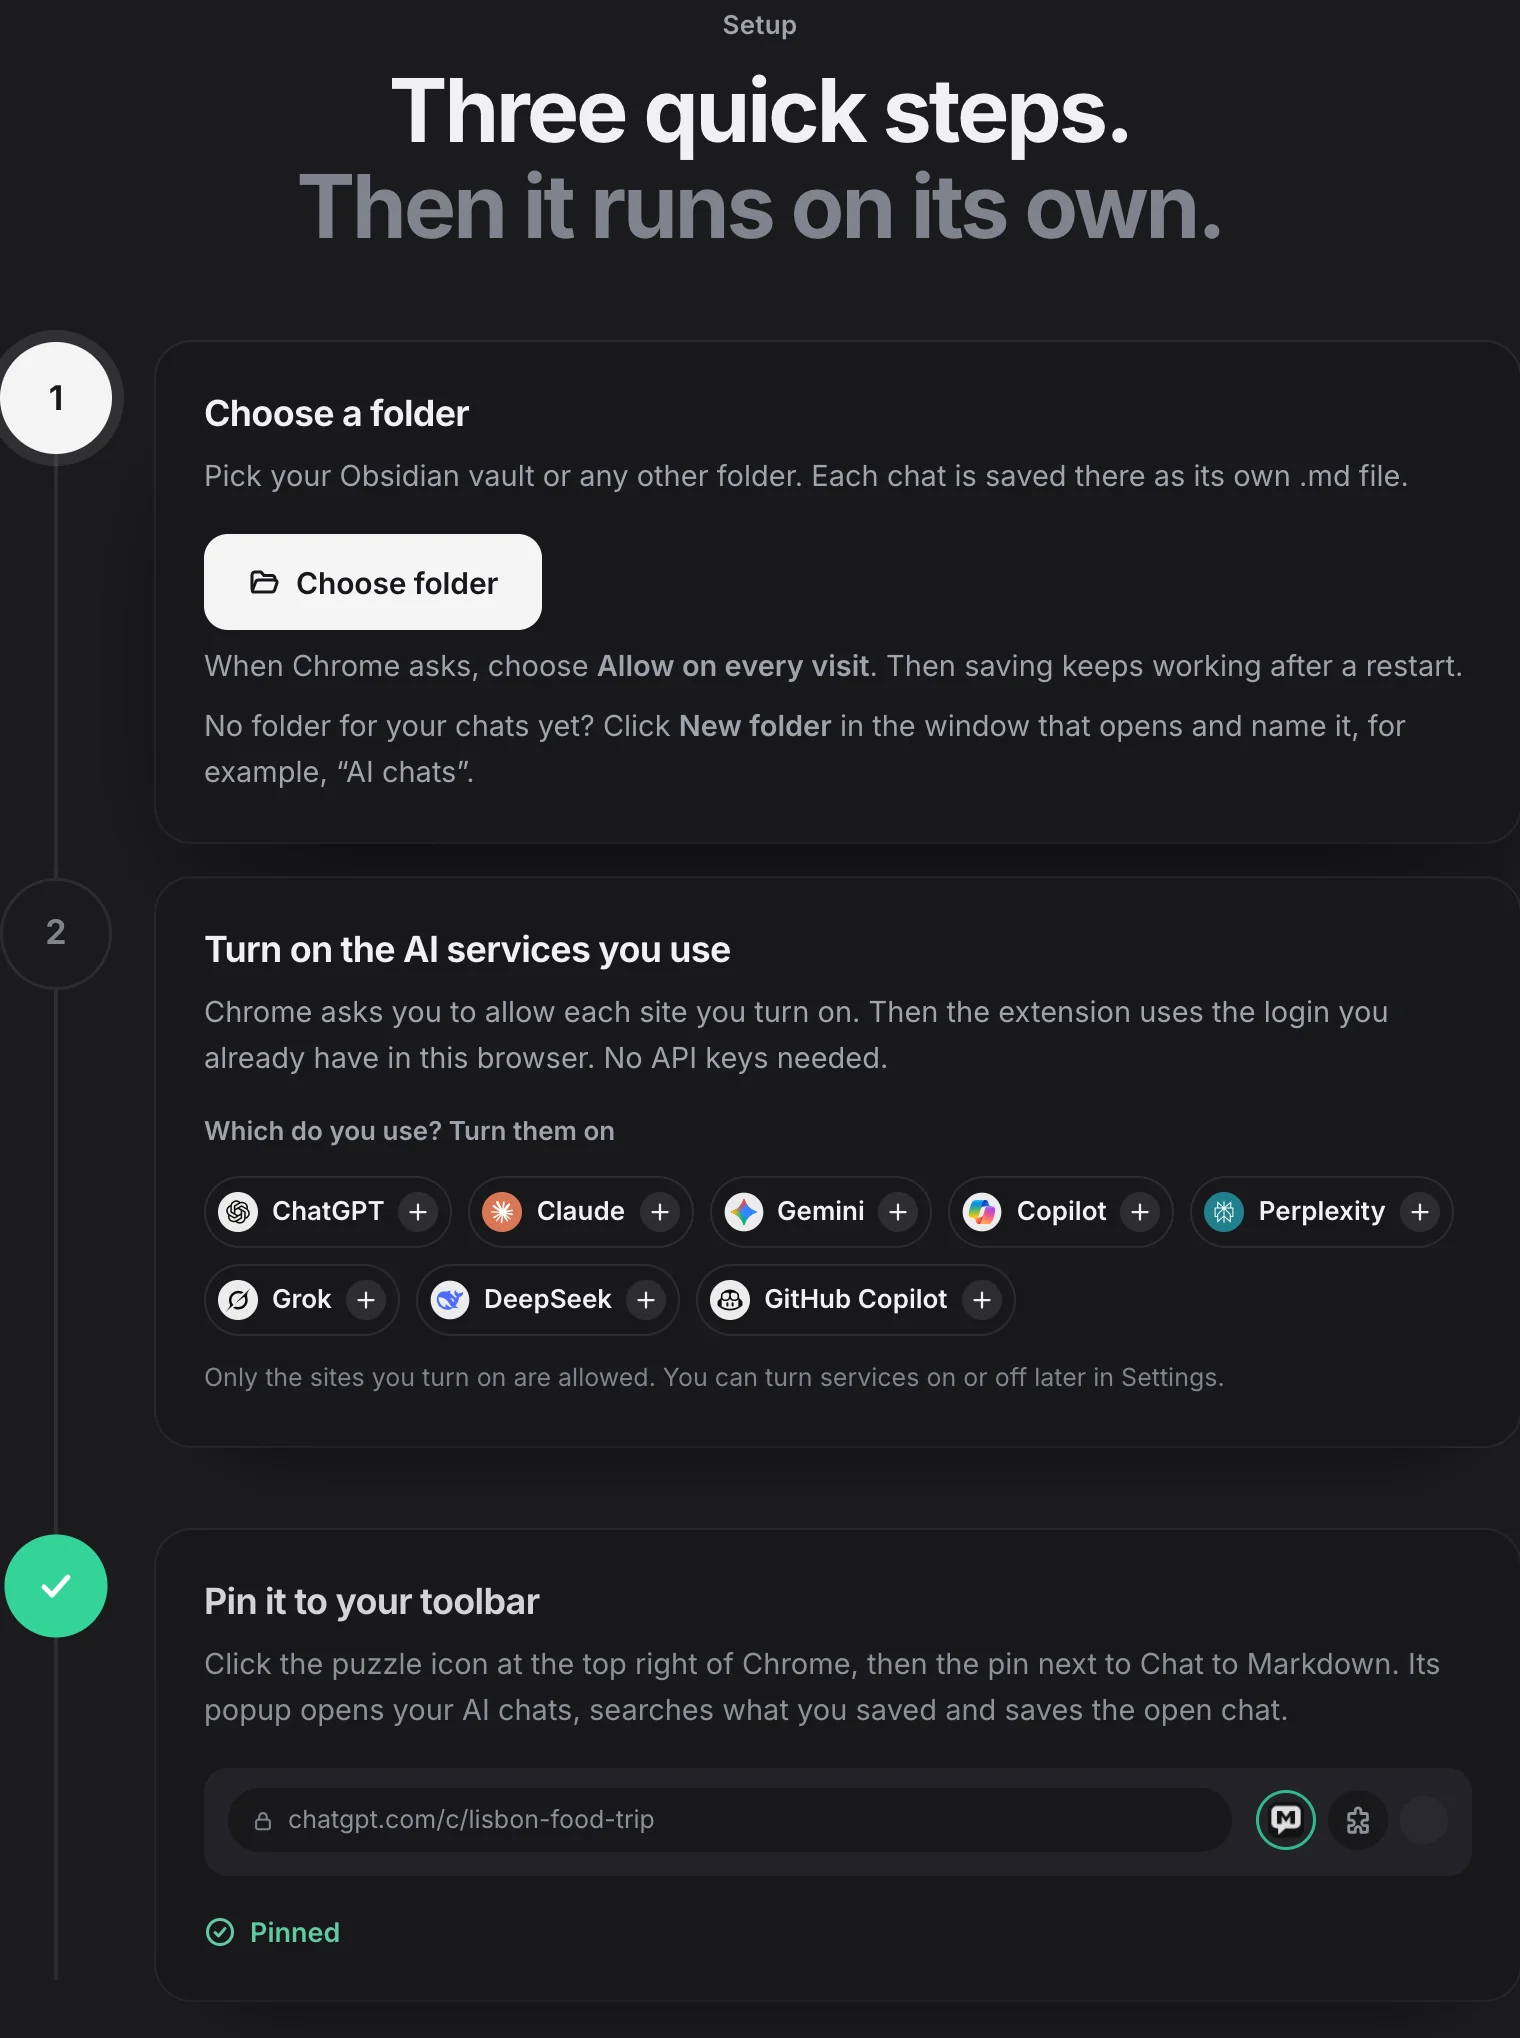
- Choose folder: where your chats are saved.
- The chat services you use, each turned on with one click.
Start saving is on the card below the steps. It begins saving once the folder is chosen.
Step 1: Choose a folder
Every chat is saved as its own .md file in the folder you pick.
- Click Choose folder. You can also click Choose a folder at the top of the page. Your computer’s folder picker opens, starting in Documents.
- Pick a folder and confirm. Select a folder and click Select (Windows: Select Folder). No folder for your chats yet? Click New folder in the picker and name it, for example,
AI chats. Chrome doesn’t accept Documents, Desktop or Downloads themselves, only a folder inside them. - Allow access when Chrome asks. Chrome asks whether the extension may view and save files in that folder. Allow it. If Chrome offers Allow on every visit, choose it: then saving keeps working after you restart the browser.
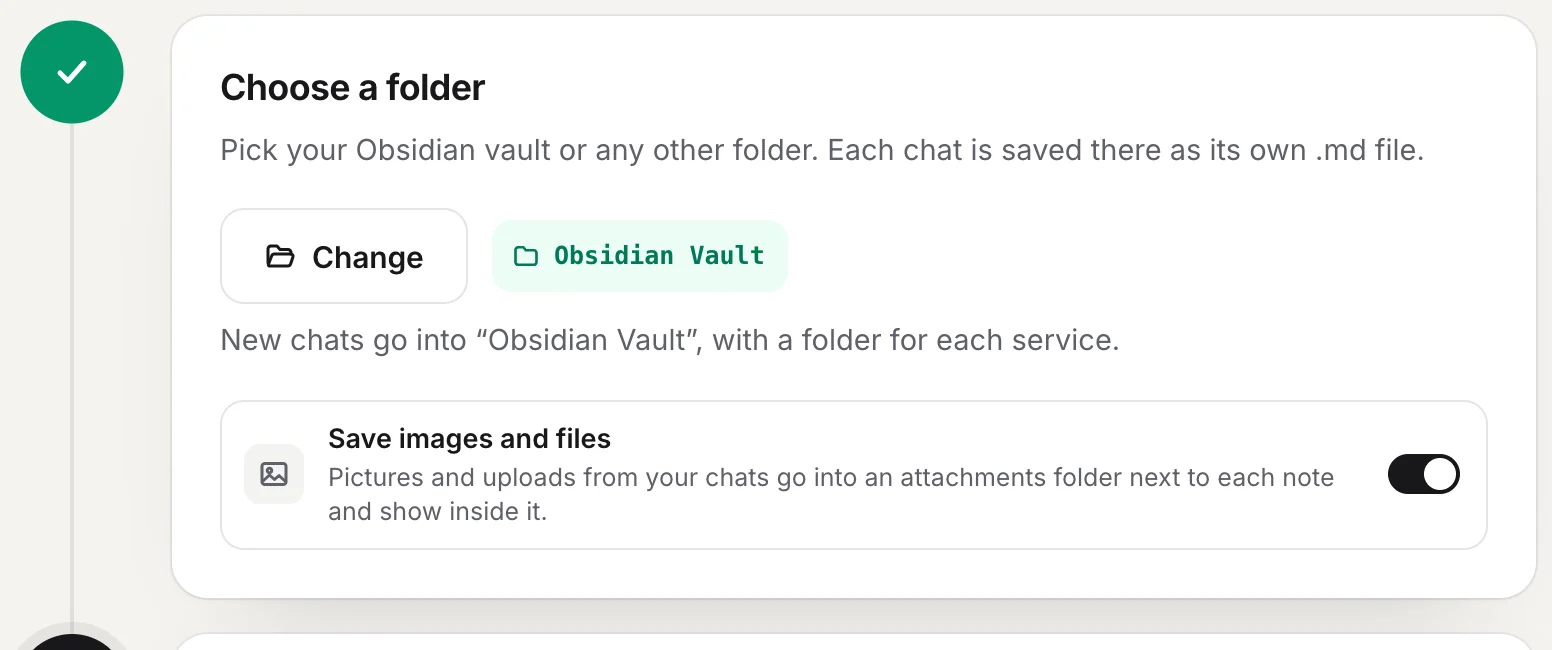
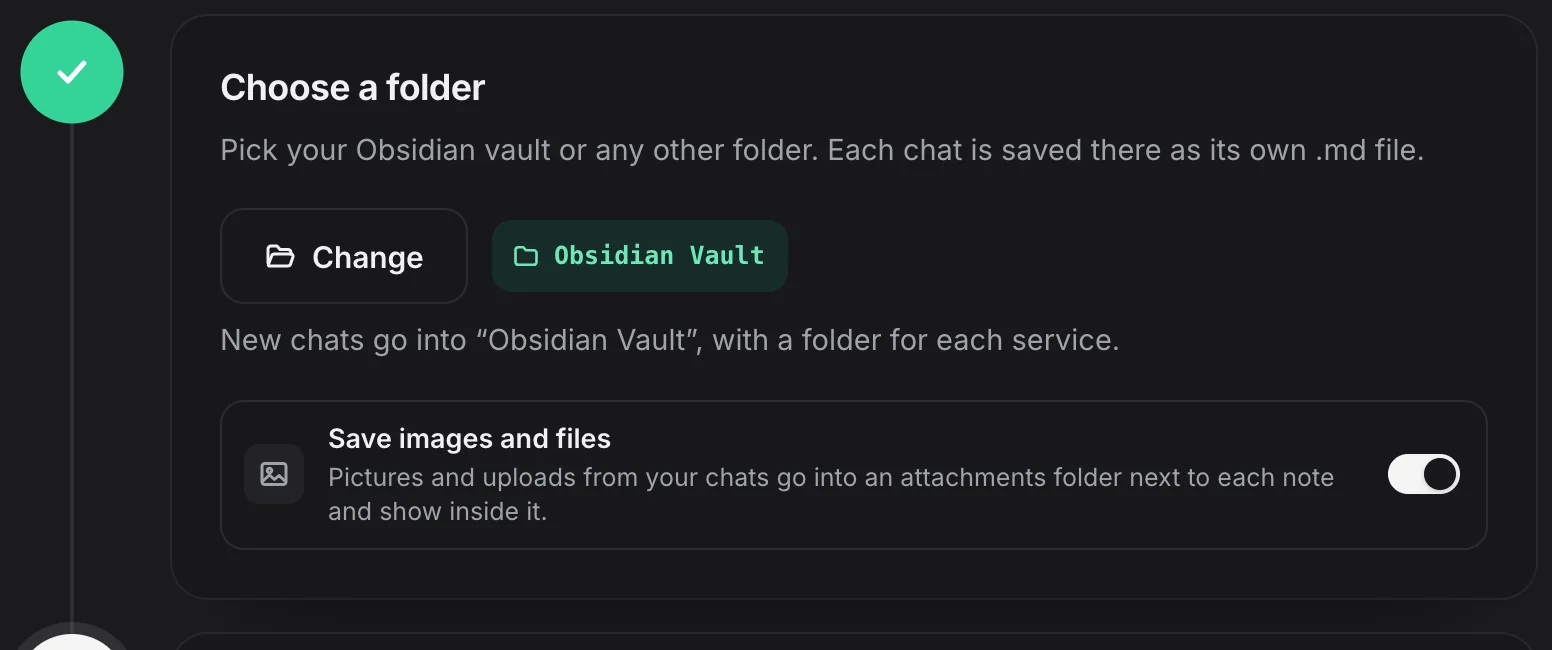
When it worked, a chip with the folder’s name appears next to the button, the button changes to Change, and the line under it says where new chats go, for example: New chats go into “Obsidian Vault”, with a folder for each service.
Choosing your Obsidian vault
An Obsidian vault is an ordinary folder, so you pick it like any other. You have two good options:
- A folder inside the vault, such as a new
AI Chatsfolder. Your chats stay together, with a folder for each service inside it. - The vault itself. The service folders (
ChatGPT,Claudeand so on) then sit at the top of the vault. If you’d rather have them in one place, set a Subfolder later in Settings → Folders and filters.
- Obsidian Vault
- AI Chats
- ChatGPT
- 2026-10-17 Lisbon food trip.md
- Claude
- 2026-10-21 Postgres index tuning.md
- ChatGPT
- AI Chats
No Obsidian plugin is needed. Obsidian sees the new files like any other note. More in Use with Obsidian and Choose your folder.
Save images and files
Once a folder is chosen, a Save images and files switch appears under it: “Pictures and uploads from your chats go into an attachments folder next to each note and show inside it.” It is on by default. Turn it off if you only want the text. You can change it any time in Settings; see Choose what to save.
If the folder step fails
When choosing brings no folder, step 1 says why under the Choose folder button, whichever button you clicked.
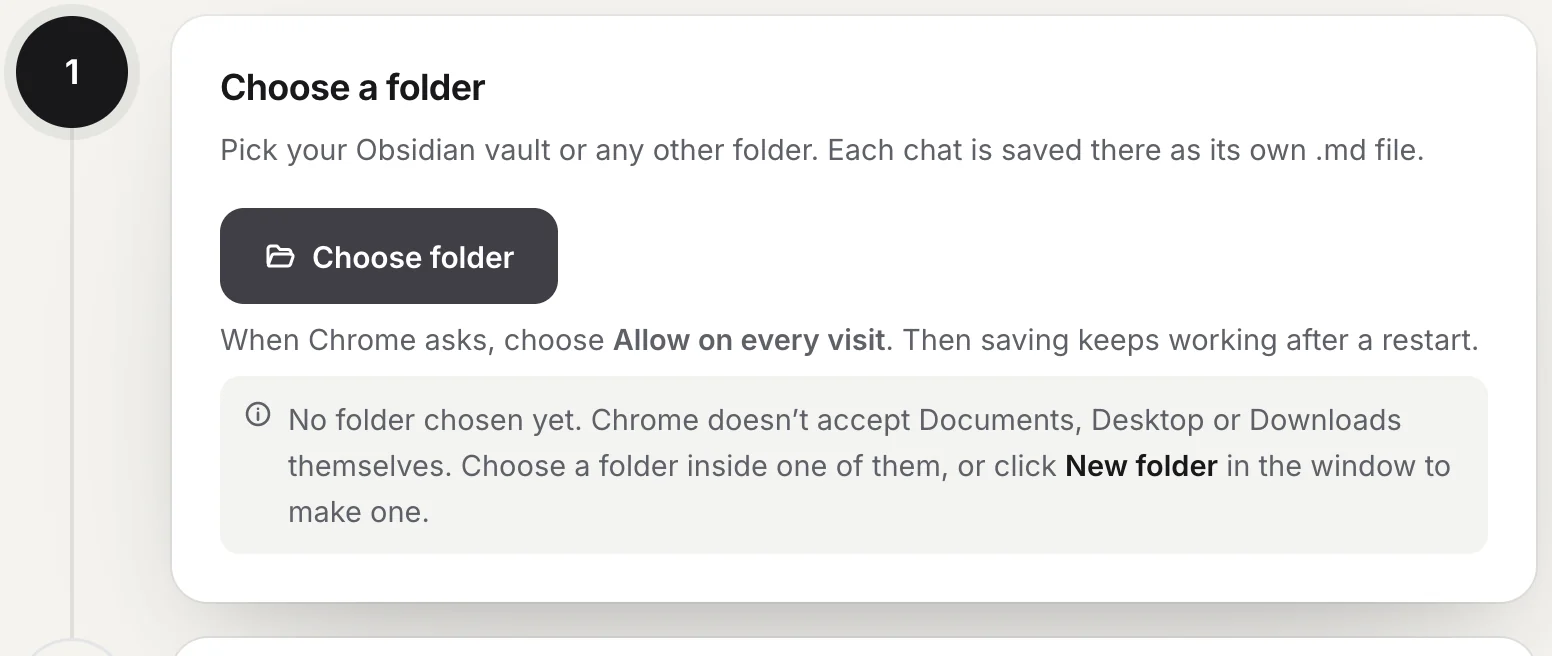
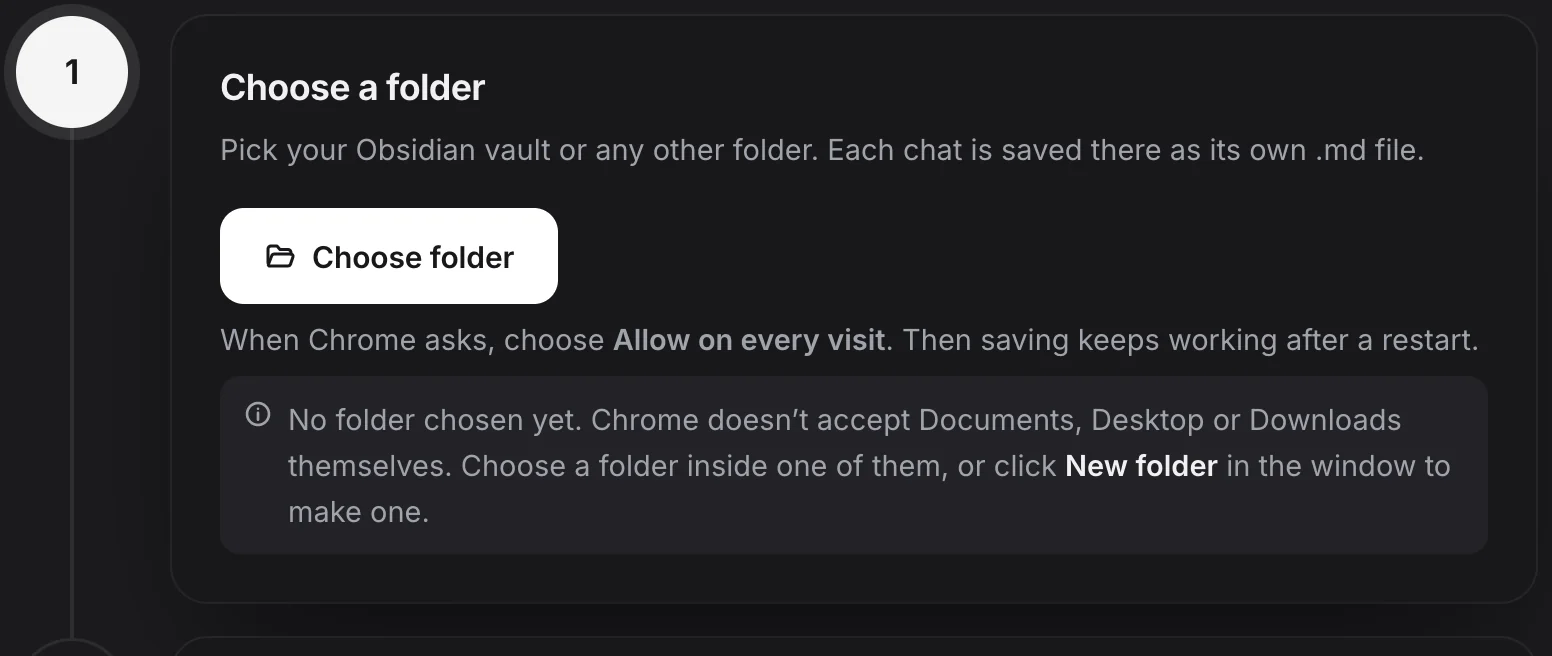
- “No folder chosen yet.” You closed the picker, or Chrome refused the folder and you cancelled its message. Click Choose folder again.
- Chrome says it can’t open the folder because it contains system files. Chrome doesn’t let extensions use Documents, Desktop or Downloads themselves, your whole home folder or system folders. Pick a folder inside one of them, or click New folder in the picker to make one, for example
Documents/AI chats. - “Brave has folder access turned off.” Brave ships with the folder feature off. Turn it on once, as described in Brave.
- “This browser can’t give an extension access to a folder.” Use Chrome or Microsoft Edge on a computer. See Install the extension.
- “Couldn’t use that folder. Try a different one.” Pick another folder, ideally one on your own disk rather than a network drive.
- Nothing happened when you clicked. The picker may have opened behind the browser window. Check your taskbar or Dock.
Later, after a browser restart, Chrome may ask for permission again if you didn’t choose Allow on every visit. The page then shows Allow access; click it and allow. See Choose your folder for details.
Step 2: Turn on the AI services you use
Every service starts off. The extension can only reach the chat sites you turn on.
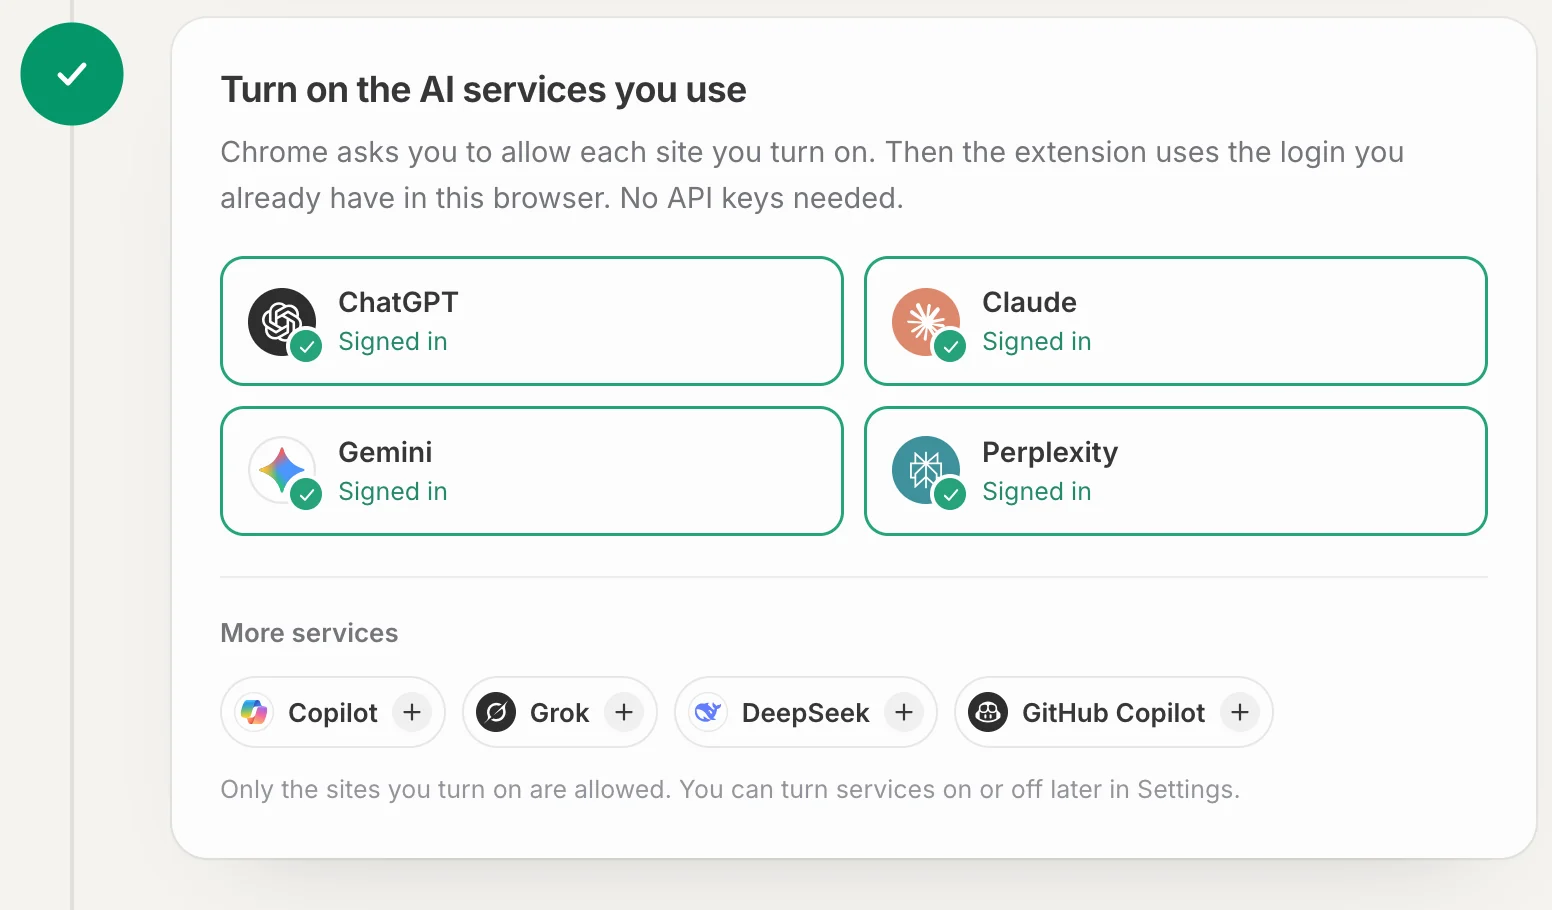
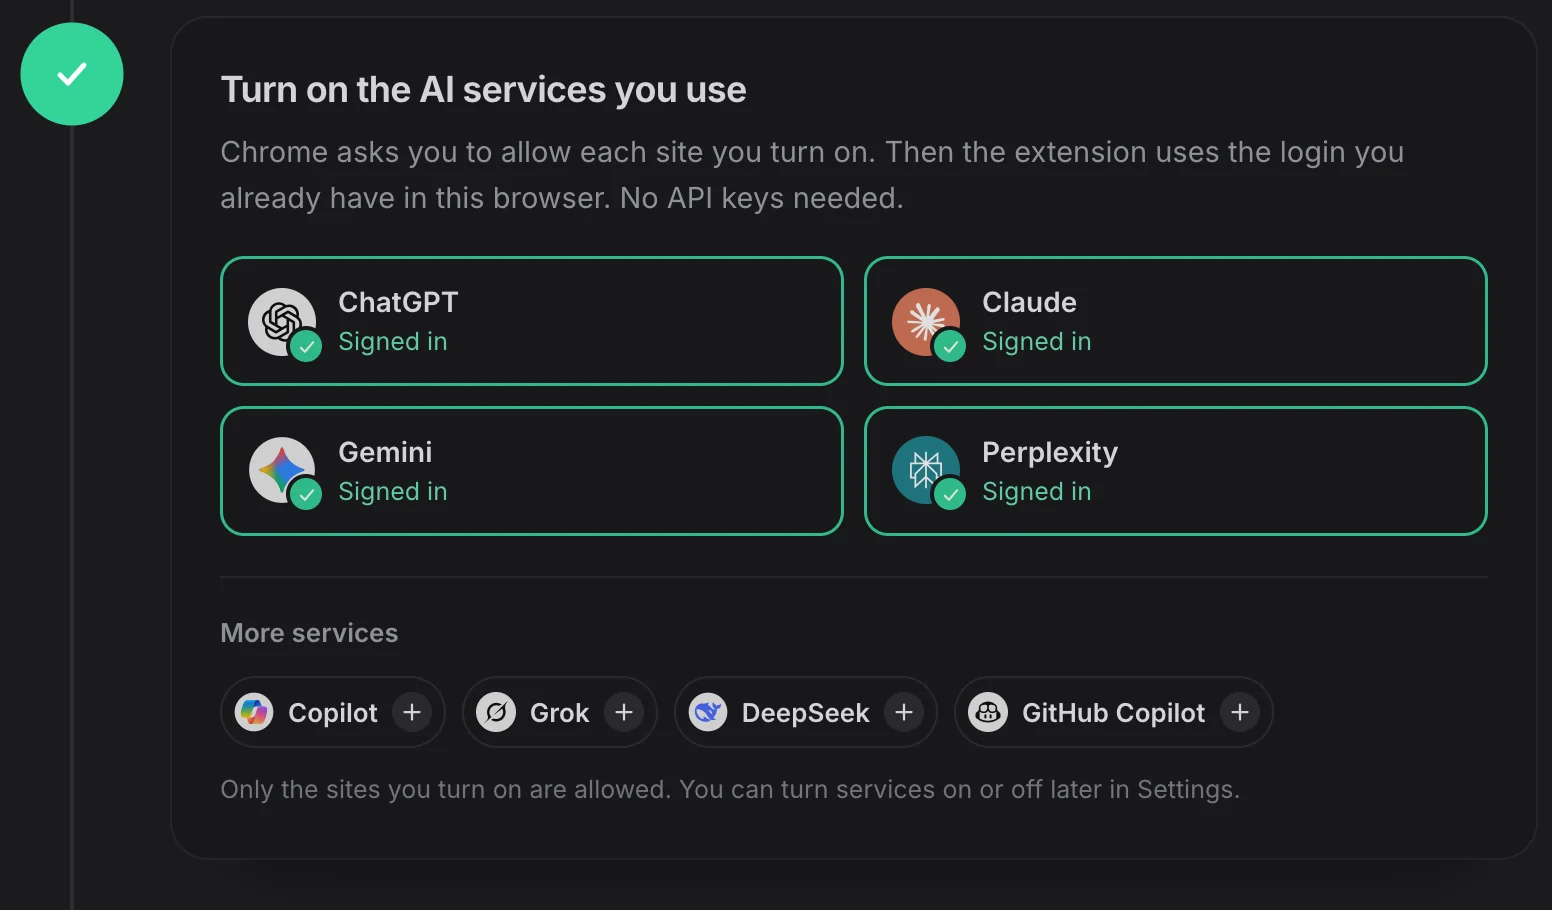
- Click a service under “Which do you use? Turn them on”, for example ChatGPT. The button changes to Allow in Chrome….
- Click Allow in Chrome’s dialog. Chrome asks to let the extension read and change your data on that chat site (and on the sites it keeps pictures and files on). This is how it reads your chats.
- Check the sign-in state. The service moves up as a card. It shows Checking…, then Signed in with a check mark.
- Repeat for every service you use. The list of the others stays below, titled “Use others too? Turn them on” or “More services”.
The extension uses the login you already have in this browser. You don’t enter a password or API key anywhere.
| The card shows | What it means | What to do |
|---|---|---|
| Signed in | Ready to save. | Nothing. |
| Not signed in | You aren’t signed in to that site in this browser. | Click Sign in, sign in on the site’s tab, then come back. The page checks again on its own. |
| Couldn’t check | The site didn’t answer as expected. | Open the site in a tab to make sure it loads, then come back. If it stays, see Troubleshooting. |
Note
If you click Deny in Chrome’s dialog, or close it, the service stays off and its button comes back. Click it again to get the dialog again. You can also turn services on or off later in Settings → Chat services or in the popup. See Chat services.
Step 3: Pin it to your toolbar
This step is optional. Click the puzzle icon at the top right of Chrome, then the pin next to Chat to Markdown. The page watches for it: “Waiting for you to pin it” changes to Pinned a moment after you pin.
If you’d rather not pin it, click Skip this step. The step then reads “Skipped. You can pin it any time.” If you pinned it and the page still waits (this can happen in some browsers), click Skip this step too.
Start saving
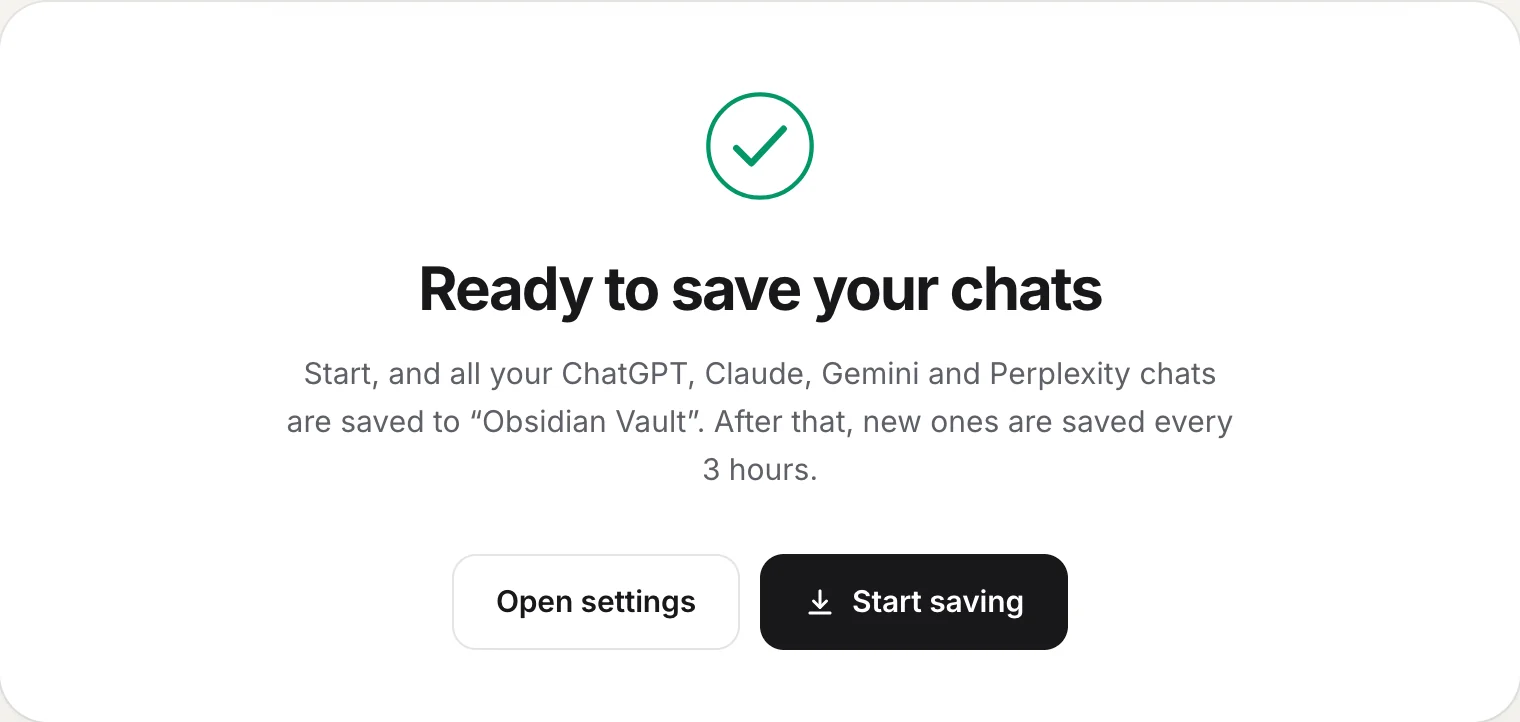
- Start saving begins the first sync.
Below the steps, a card tells you what will happen. Once a folder is chosen it reads Ready to save your chats, with a line like:
Start, and all your ChatGPT, Claude, Gemini and Perplexity chats are saved to “Obsidian Vault”. After that, new ones are saved every 3 hours.
On Free it says your latest chats, up to 10 in all, are saved, and kept up to date. See Free and Pro. If no service is signed in yet, the line ends with what to do first.
Click Start saving. Until you do, nothing is saved automatically, not even when you leave a chat. (A chat you save yourself with the Save button is saved right away.)
What the first sync does
After Start saving, the card changes as the first sync runs:
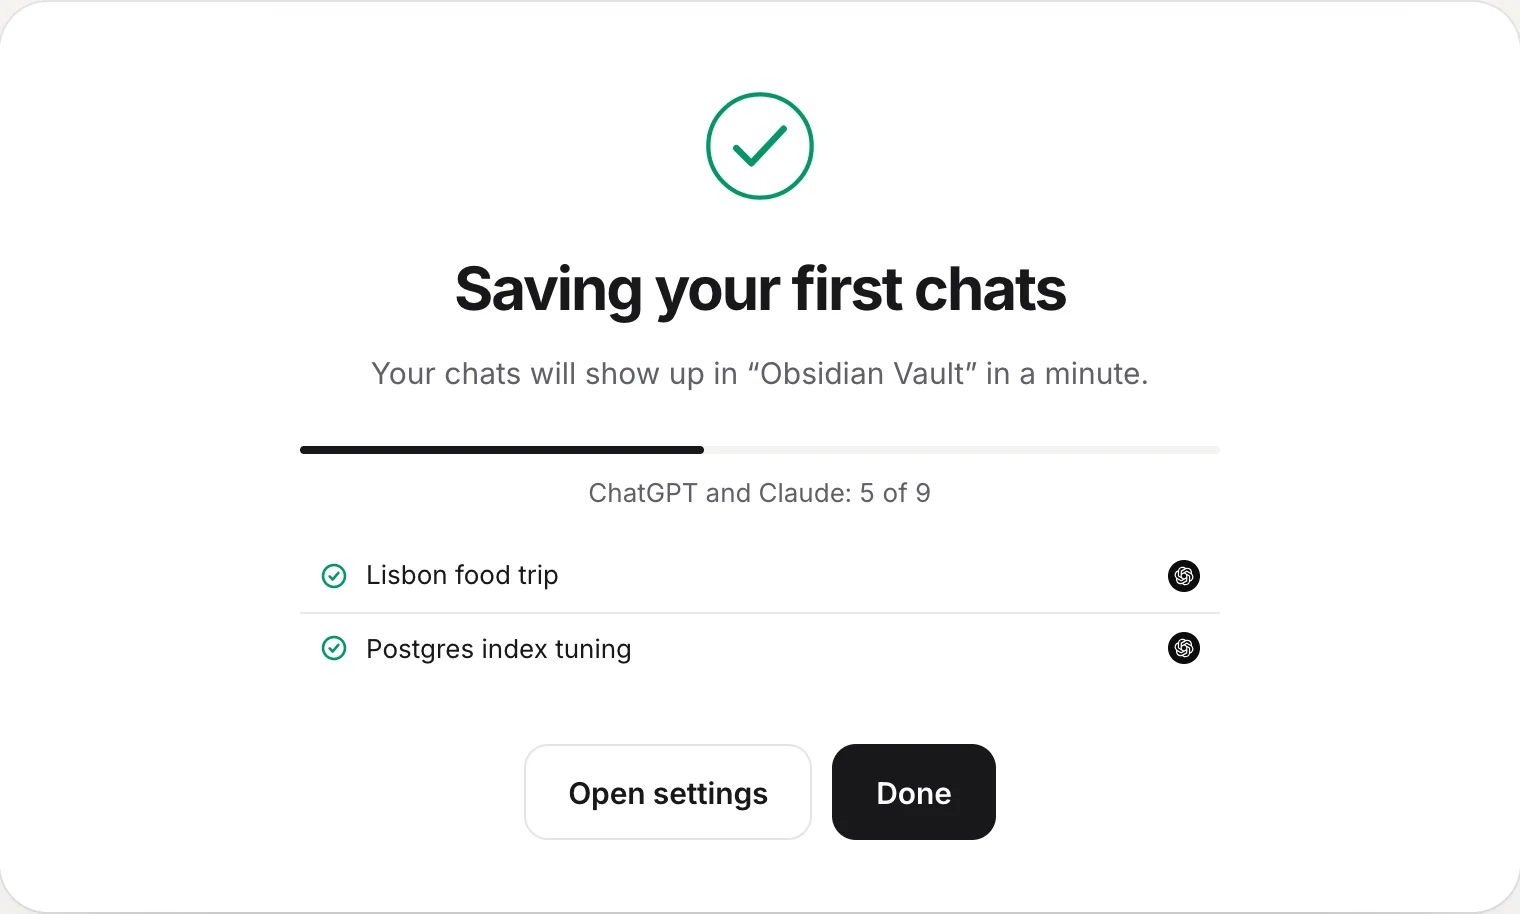
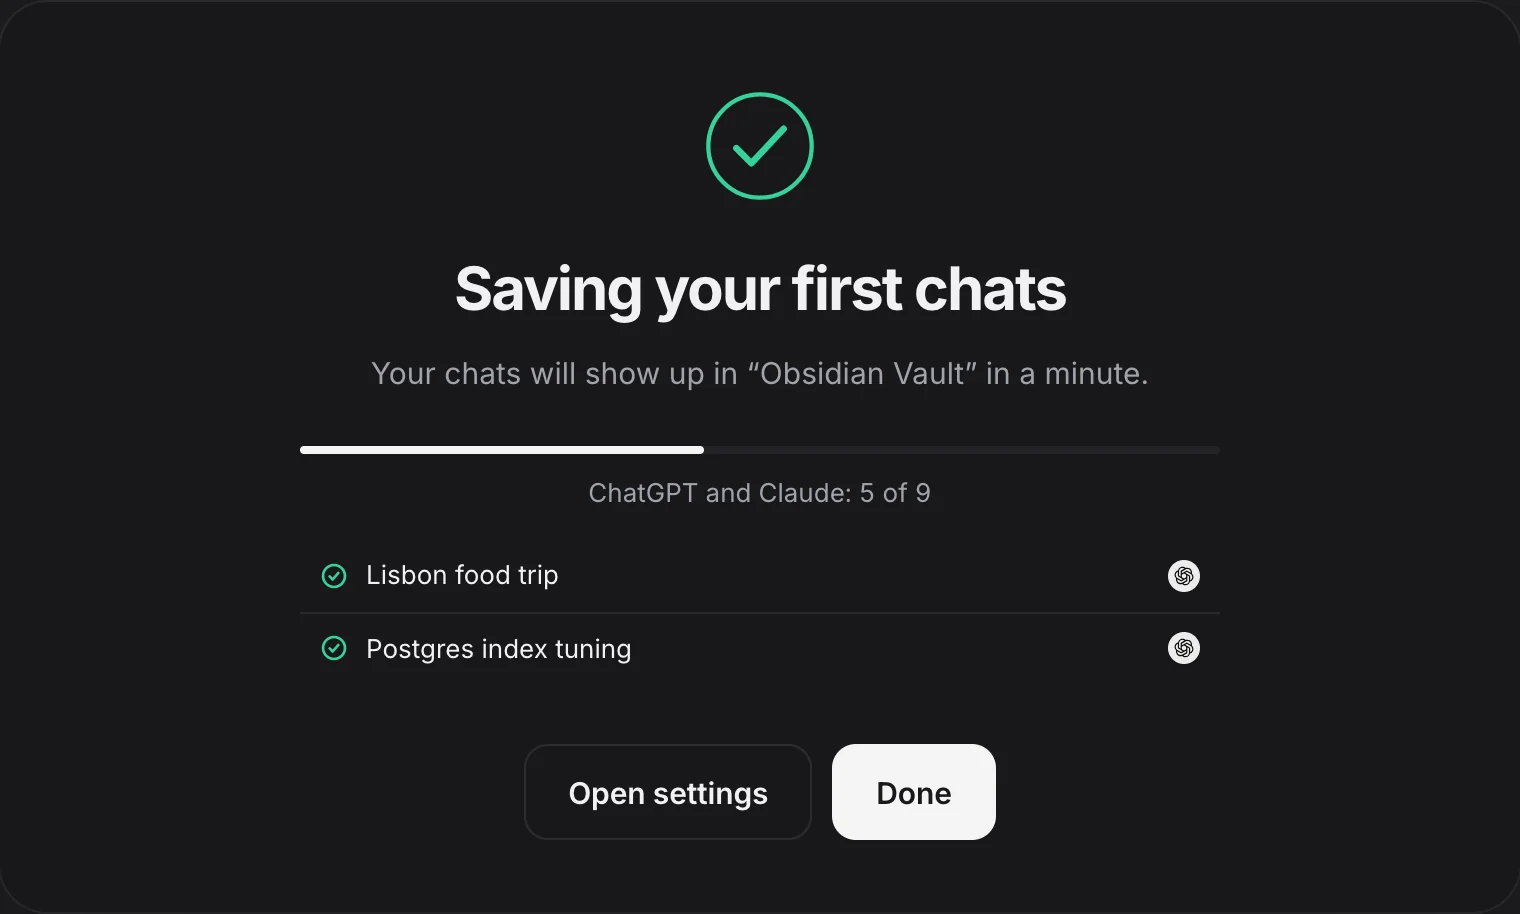
- The title reads Saving your first chats, with a progress bar and a line such as
ChatGPT: 3 of 10or “Looking for your chats…”. - The last five chats saved appear in a list, each with its service’s logo.
- When it finishes, the title reads Your chats are saved and a See saved chats button opens the reader.
What gets saved depends on your plan:
- Free saves your latest chats, up to 10 in all across every service you turned on, and keeps those 10 up to date. See Free and Pro.
- Pro saves every chat you have ever had, newest first, a batch at a time. A long history can take a while, because the extension only goes as fast as each chat site allows. It carries on in the background, even after you close the page or the browser. See How saving works.
You can close the page at any time with Done. Saving doesn’t depend on it.
On Free with more than 10 chats
If you have more chats than Free keeps, a band below the card says so, for example “1,284 older chats aren’t saved yet”, with a Save all of them button. Otherwise it reads “Want your whole history?” with See Pro. Both open the plans. This is optional; Free keeps working.
After setup
From now on it runs on its own:
- New and changed chats are saved every 3 hours by default. Change that in Auto-save and schedule.
- A chat is also saved a few seconds after you leave it.
- On every chat page, a Save button sits next to Share. See The Save button and shortcut.
Further down the welcome page, Import your chats brings in a service’s data export, and “Good to know” shows where things are. A quick tour covers the same ground.
If the done card says something else
| You see | What it means | What to do |
|---|---|---|
| Nothing saved yet | No folder chosen. | Do step 1. |
| Saving is paused | Chrome no longer allows the folder. | Click Allow access in step 1 and allow. |
| One more step | No service is signed in yet. | Turn on a service and sign in, in step 2. |
| You’re all set | Saving is on; chats will show up in a minute. | Wait, or click Done. |
| A service saves “only the chats you pick” | That service is set to Only chats I save. | Click Save in a chat to add it, or change it in Chat services. |
If the first sync shows nothing for a long time, open the popup: it says what each service is doing, such as waiting because a site asked it to slow down. The Sync log lists every chat saved or skipped and every problem. More fixes are in Troubleshooting.
Questions
I closed the welcome page. How do I get it back?
Open the extension's Settings and click Welcome tour at the bottom of the page. The toolbar popup also lists the steps left, with a Start saving button.
Does anything get saved before I press Start saving?
No. Choosing a folder only checks that it can be written to. Automatic saving, including saving when you leave a chat, starts only after you press Start saving. A chat you save yourself with the Save button is saved right away.
Should I pick my whole Obsidian vault or a folder inside it?
Either works. Each service gets its own folder inside the one you pick. Many people make an "AI Chats" folder in the vault and pick that, so the chats stay together.
Do I have to pin the extension?
No. Pinning only keeps the popup one click away. Click Skip this step if you'd rather not.